
You should know, that I am a bread person. Deeply and unapologetically. Perhaps one might even define me as a bread snob. I respect those that make white flour varieties like baguettes and brioche, but those aren’t what get my engines going. The breads I love are the ones that are difficult to master, and the most delicious to eat. Particularly, whole grains, ancient grains, seeded, and fermented varieties. The ones with respectable chew, tons of nutrients, and loads of flavor.
The recipe I’m sharing in this post is very exciting because it is all of those things I just described loving above, yet it is super easy to make. It comes from Accidental Artisan whom I’ve come to love several recipes from. I highly recommend you have a look.
Basically, you combine all of the ingredients the night before and 8 hours later, you wake up and bake! I should say, there are a couple of steps before you bake, but they are very easy and don’t take much time at all. Follow the recipe below and you are almost certain to end up with a successful loaf. If you’ve ever been afraid of making bread, this is a great recipe to try your hand.
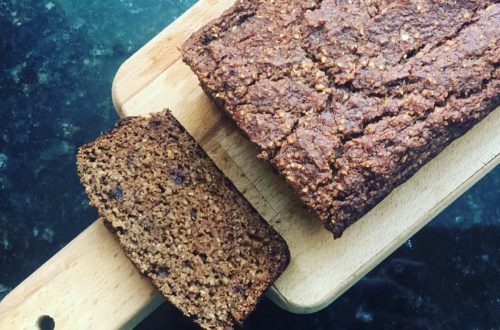
Seeded Spelt Bread
Recipe adapted from Accidental Artisan
Ingredients:
- 100 g whole-grain spelt flour
- 300 g all purpose, unbleached spelt flour (white spelt flour)
- extra all purpose, unbleached spelt flour for dusting
- 20 g poppy seeds
- 20 g sunflower seeds
- 20 g pumpkin seeds
- 40 g sesame seeds
- 40 g flax seeds
- 20 g caraway seeds
- 72 ml hot water for flax seeds
- 1 1/4 tsp sea salt
- 1/4 tsp instant yeast
- 300 ml room temperature water
- 1 tbsp local honey
- sesame, sunflower and pumpkin seeds for sprinkling (optional)
Method:
Pre-heat oven to 350 degrees F. In a medium-sized bowl, mix flax seeds and hot water. Set aside to cool. On a baking sheet, spread out sunflower and sesame seeds evenly and toast in the oven for about 10 minutes until lightly browned. Watch them though, they can go from toasty brown to burnt very quickly. Once cool, add to the flax seeds, along with the remainder of the seeds. Stir to combine.
In a large glass bowl, stir together the flour, salt and yeast. In a glass measuring cup, like this one here, stir together the honey and room temperature water (I find a liquid measuring cup like the Pyrex I linked to is easiest to pour into the flour mixture). Pour the seeds into the honey water and stir to combine.
Pour the liquid into the flour mixture and stir with a wooden spoon to combine. Stir until combined and the dough is wet and sticky, then cover with plastic wrap and allow the dough to sit at room temperature until the surface is bubbly and is about 1 1/2 to 2x the size it started. This will take about 8 hours.
When the dough has risen after 8 hours, pre-heat your oven to a scorching 475 degrees F and place a cast iron pot with a oven-safe lid into it. The pot should pre-heat for at least 30 minutes, but this will happen naturally while you’re doing the rest of the steps.
Dust your counter with white spelt flour and pour dough out of the bowl and on top of flour. Wet your hands lightly with water and gently pat out the dough into a rectangle, with the long side facing you. Using a scraper like this one, fold the right side (a short side) into the middle of the rectangle. Then fold the left side (the other short side) on top. Coming from the bottom (closest to you), fold the dough into half into a chunky little square. This tutorial on the folding technique is very helpful. Dust lightly with flour, cover with plastic and allow to rest for 10 minutes.
While you’re waiting, line a large bowl with parchment paper (punch down or place something to hold it in place). Wet your hands lightly with water and repeat the folding process again, then rest for 5 minutes. Then repeat the folding process one more time, but this time place the dough into the parchment-lined bowl, seam-side down. Cover with plastic wrap and rest next to the stove for 20 minutes.
After 20 minutes, take a lightly floured finger and press it gently into the dough, just off-center. If it springs back slightly, but the indentation remains, it is ready. If the indentation fills in, let it rest for 10 more minutes before re-testing.
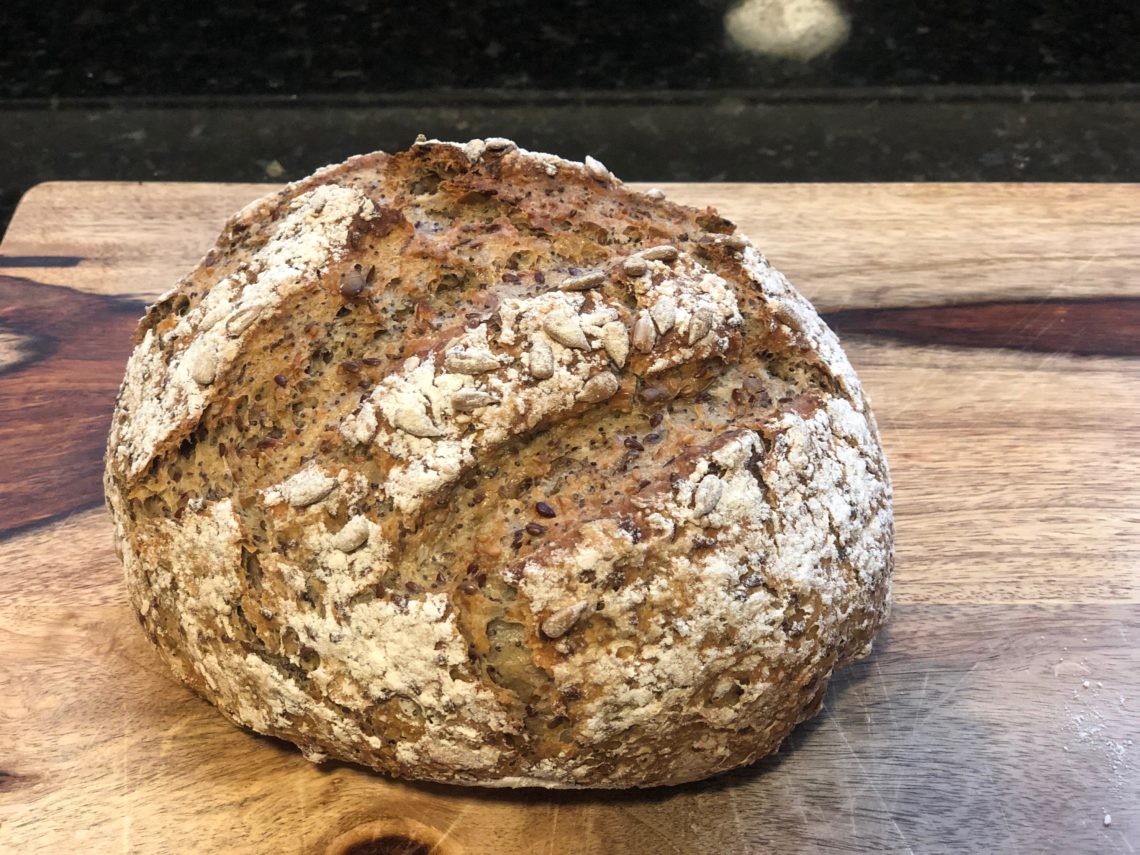
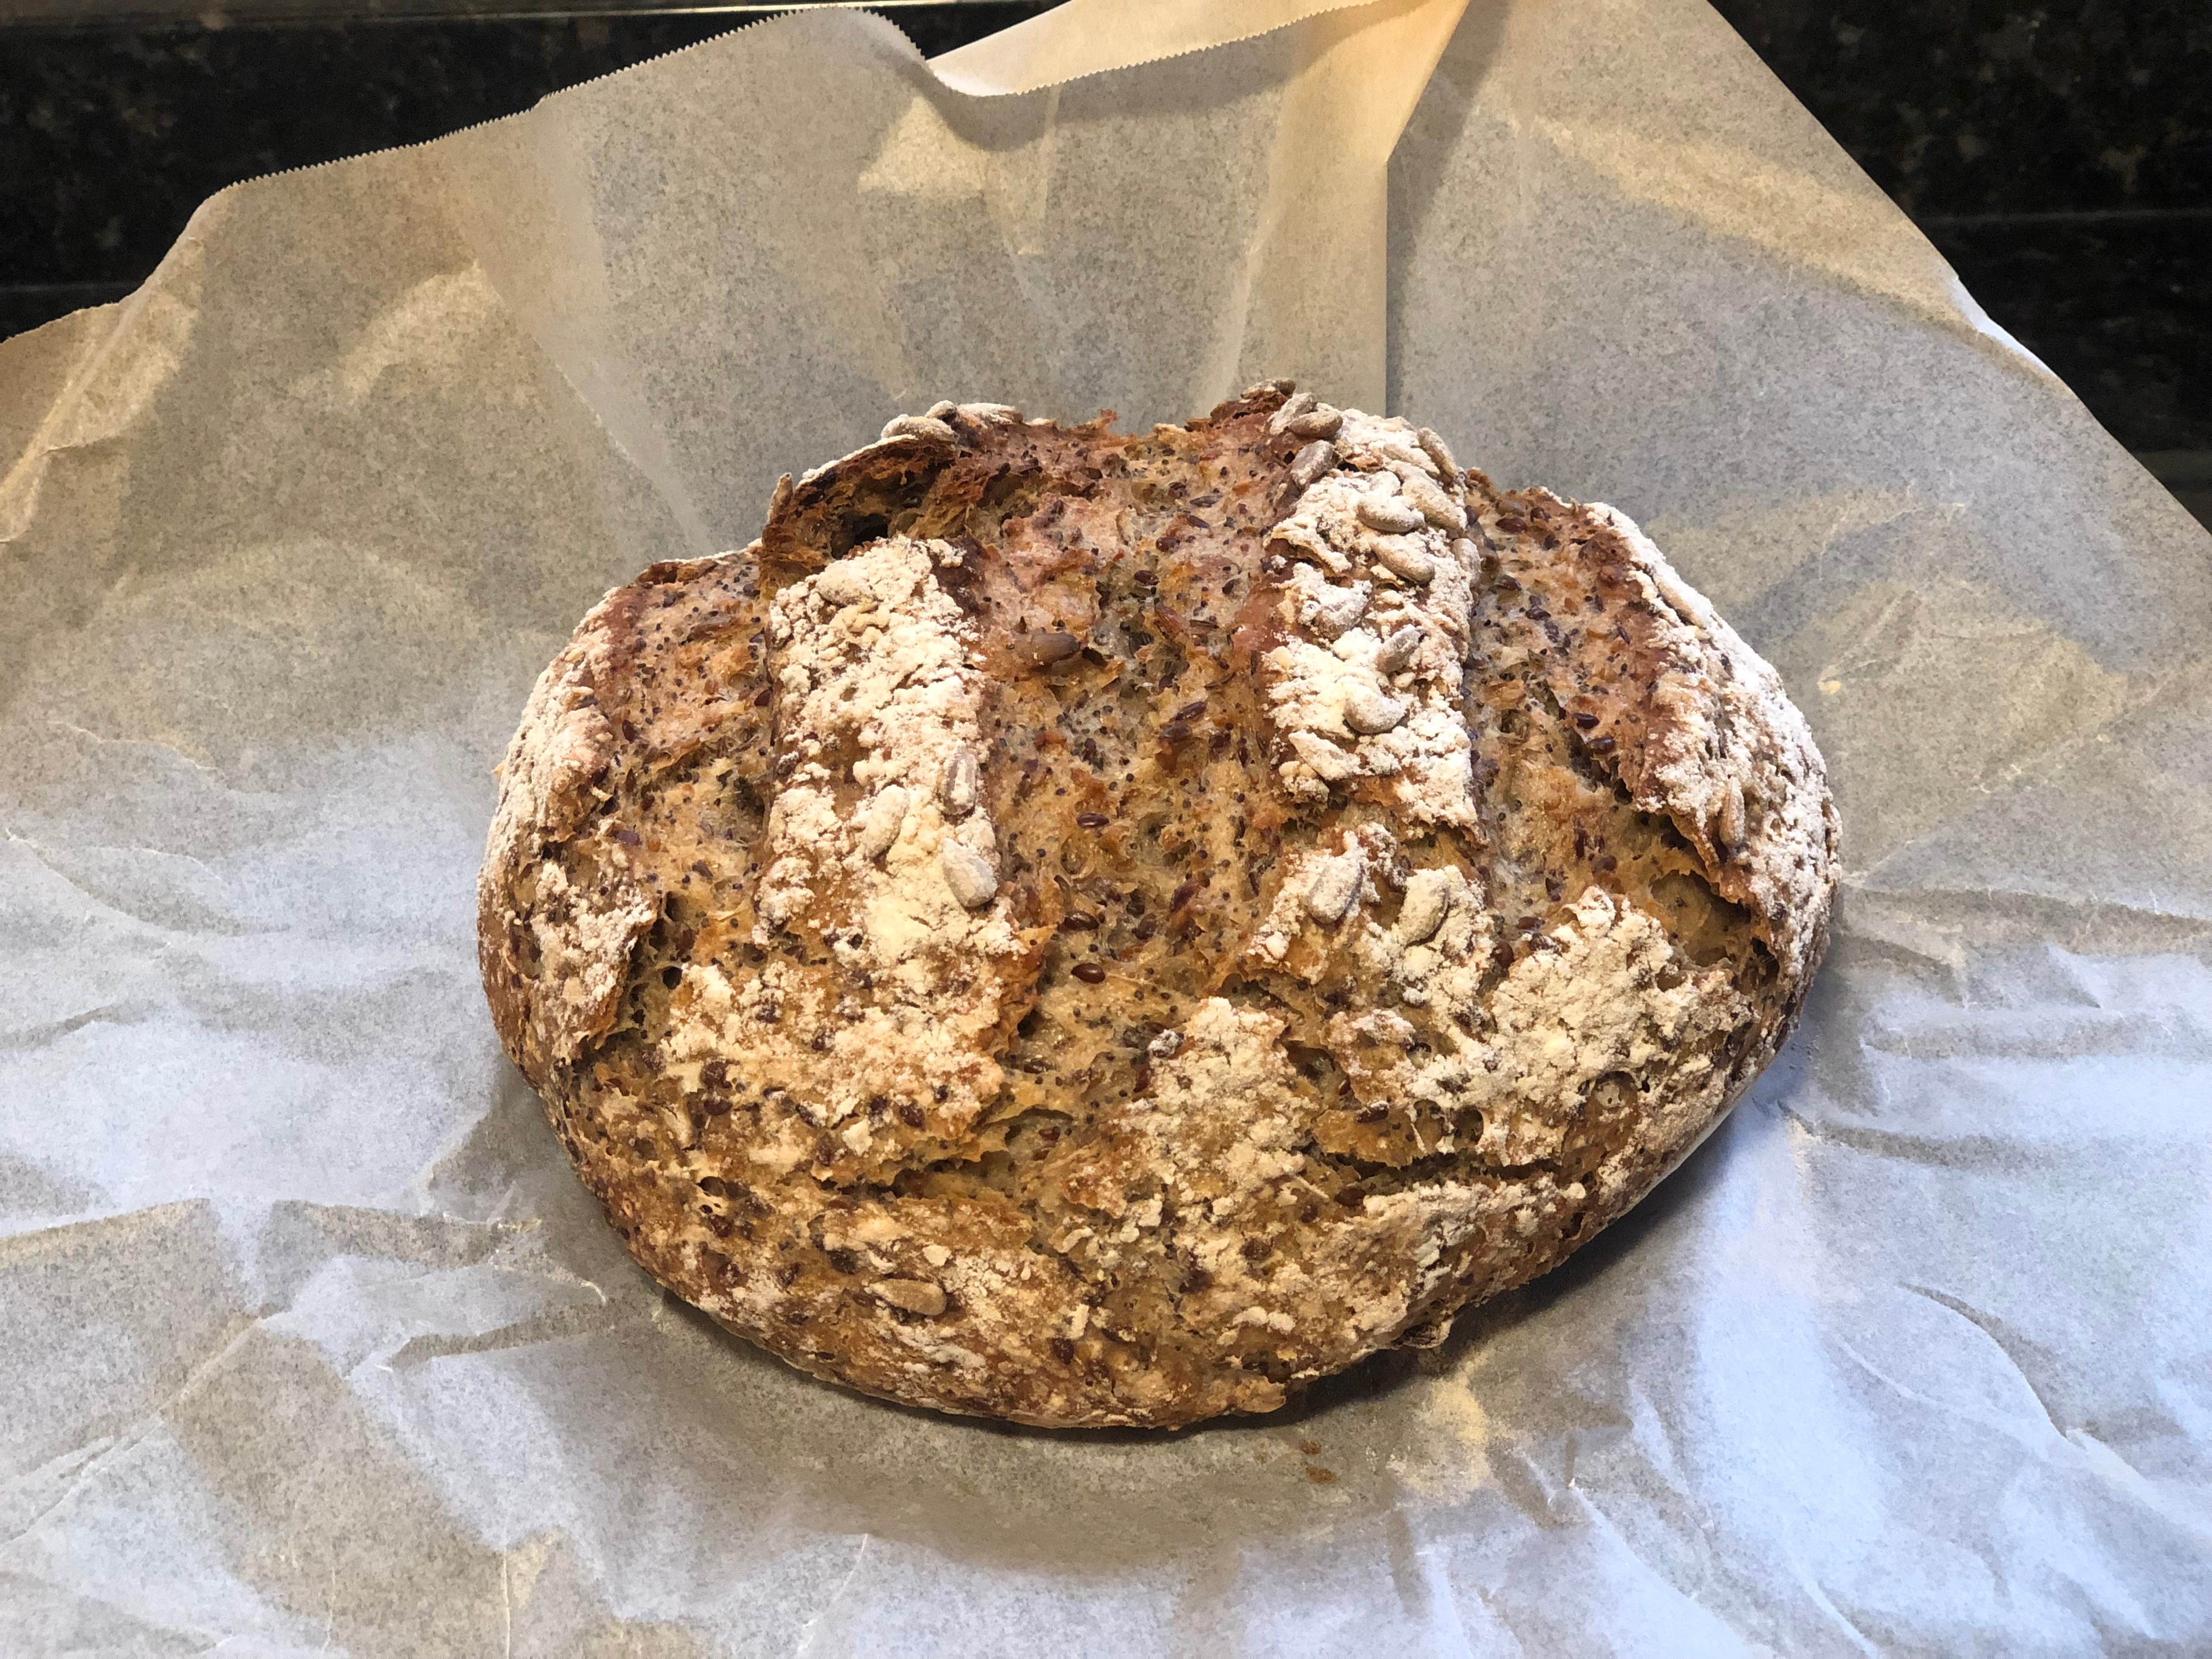
Once the dough is ready, carefully remove your pot from the oven and remove the lid. Lift the dough out of the bowl by the parchment paper and carefully place into pot. For a pretty, artisan aesthetic you can wet the top of the dough with water and sprinkle extra seeds on top, then lightly dust with white spelt flour using a small sifter. This is optional. Using a sharp knife (or lame), make 3 deep slashes into the top of the bread. Don’t be shy, these score lines will help the bread to expand in a consistent way while it’s baking. Cover the pot with the lid and place in oven. Reduce the heat to 450 degrees F and bake for 30 minutes.
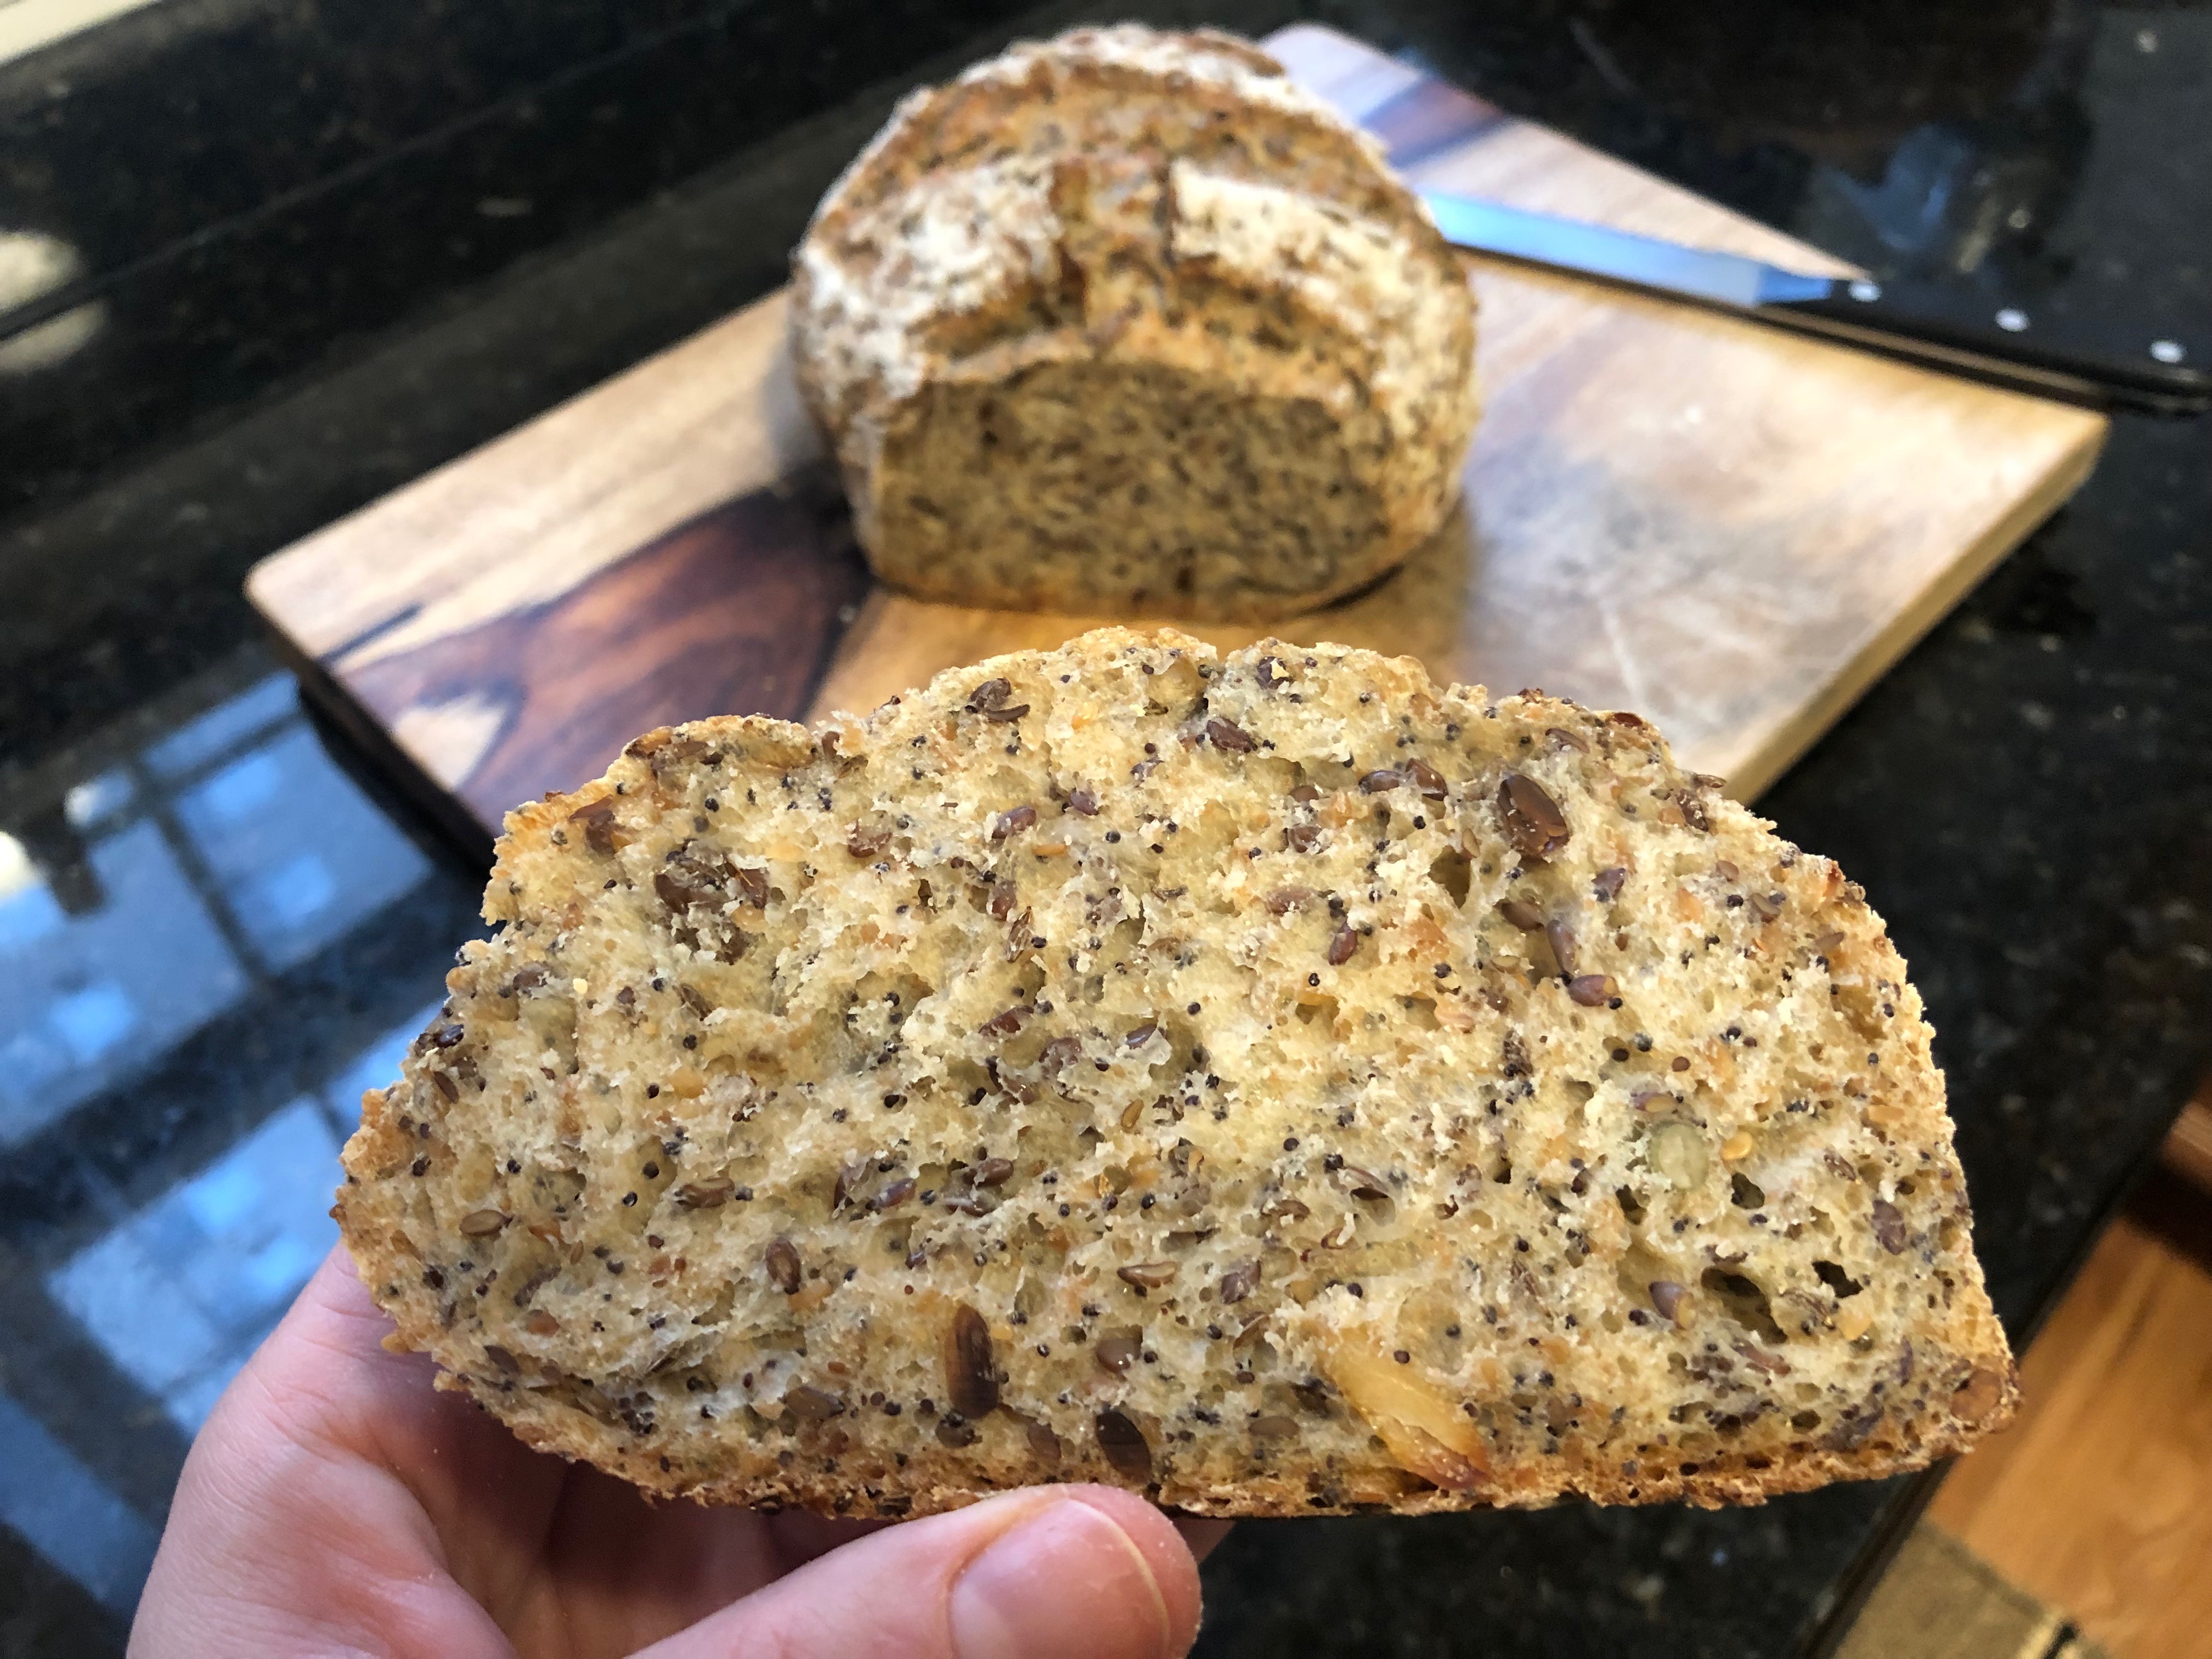
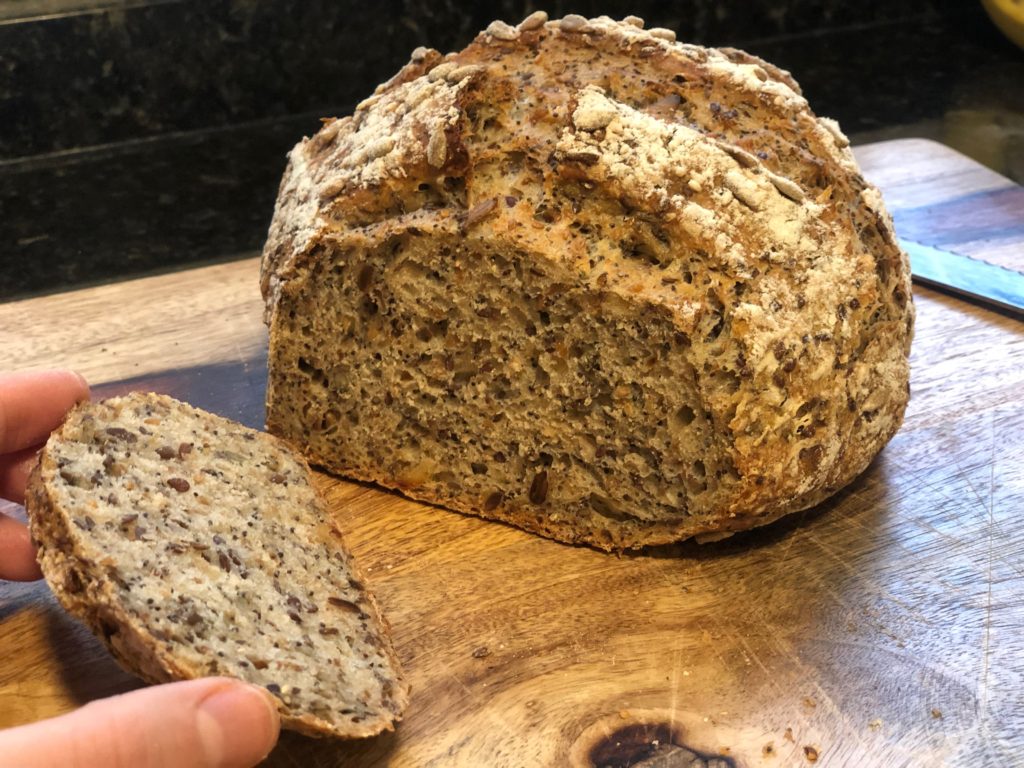
After 30 minutes, remove lid and bake for another 10 minutes uncovered. Carefully remove the bread from the oven and use the parchment paper to lift out of the pot and onto a cooling rack. Do NOT dig into right away, as tempting as it is. Allow it to cool for at least an hour or two before slicing. I found this kept well for several days, covered at room temperature. Note: when the bread is covered and eaten over a few days, the crust will become more soft, but it still tastes delicious.


One Comment
Sophie
Thanks so much for sharing my recipe. I love to see how people end up making it their own. 🙂 Happy baking!